


I love the idea of a light box, but have never built one because of the room it would take up. Sure, I have the space for 800 ponies, but certainly not for a gigantic box to take photos in! Besides, any box left laying around here instantly becomes a cat bed.
This idea popped into my head in the birthplace of most ideas, the shower. Why not make a three sided lightbox that can be propped up and flattened for storage? I quickly scribbled down the idea before leaving for work and purchased my supplies on the way home.
Supplies needed:
Ruler/Yard stick
Tape
Xacto Knife
Pencil
Paper
Foam Board (whatever size you want. I got the largest Kroger had available)

Using your handy dandy graphite marking tool and ruler, measure the foam board into thirds.

After you have your board neatly divided, measure measure 1" in from the sides. You need to make windows for the light to get through, so you want to mark what will be cut out on each panel.

Carefully cut out each window panel. It's best to do this before the next step, or else the board will be too flimsy to hold up when you cut the sides. Be careful you don't cut yourself! If you're afraid of the knife, allow your feline assistant to help you.


Now, carefully cut along the lines dividing the panel into thirds. You don't want to cut all the way through the foam board, just through the first paper layer and the foam layer. This will allow the board to bend, but stay together.

Your light box is almost ready to use! It should be able to stand up on its own.

Now, all you have to do is tape the paper to the openings. This will diffuse the light and soften shadows.

Your light box is now ready to use! If it's too short, you can easily prop it up with whatever you have laying around. I use the green magnetic strips above the art desk to hang fabric from for my backdrops. A lamp was placed at each of the openings to even out the lighting. Be sure to inspect the inside for any trace of cat treats before photographing ponies!

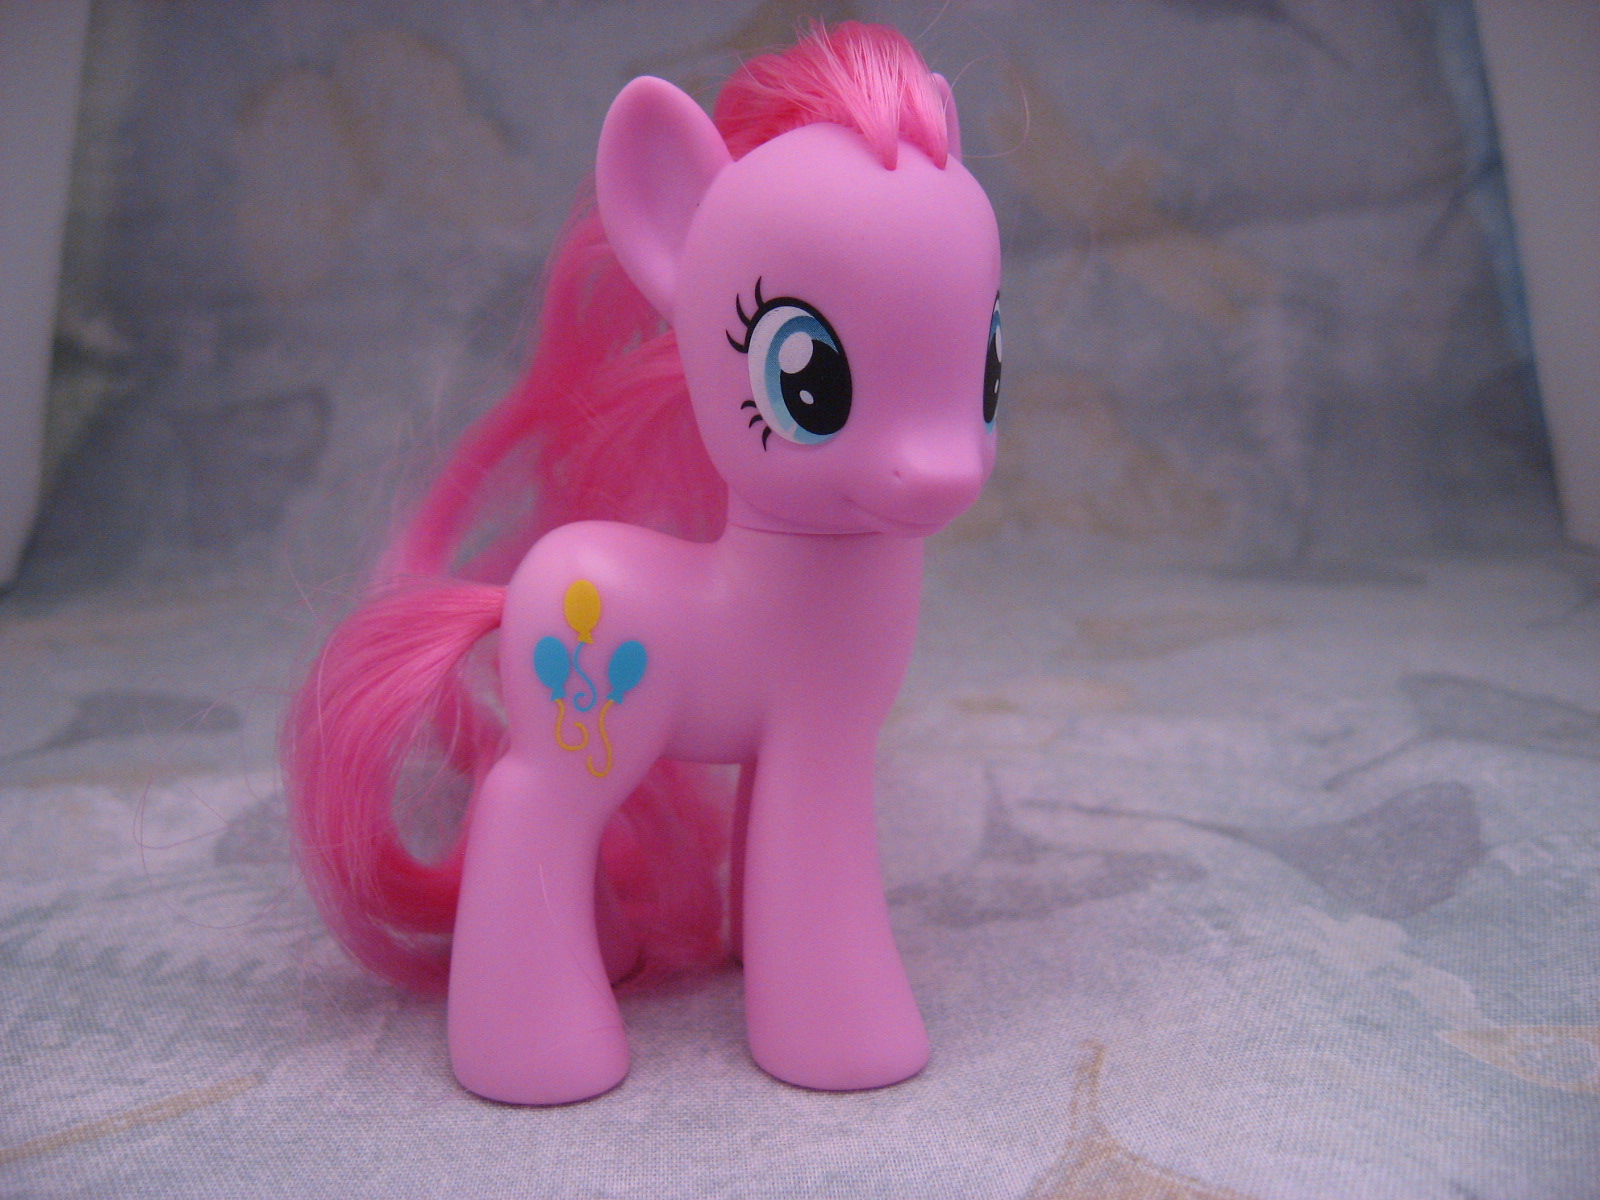
And, to show an example of how useful a light box is, the following picture was taken without the lightbox, but with the same three-lamp setup. Notice the shadows between Pinkie's eyes, the sharp shadow on her neck, and the dark shadow under her? It's not a bad photo, but it can certainly be better.

This photo was taken with the light box. The camera settings and light setup are exactly the same. I really should have taken the time to iron my fabric and crop out the light box edges, but those aren't the main focus of the photo. See how Pinkie is now an even color and almost glows? This is the difference a light box can make.
There is a lot more information out there on post-processing your photos and on various lightbox setups. In fact, I have some nice resources for you!
When you're done with your photo shoot, the light box can be flattened and placed behind the art desk or wherever you choose to store it. No massive thing to take up precious pony space, but all the benefit! What more could you ask for? Chocolate, maybe, but you'll just have to buy that for yourself ;)
Additional lightbox and photo resources:
Taking Professional Looking Photos Without a Professional
Pictures of Ponies and how to take them
No comments:
Post a Comment